
Table of Contents
- Why Gel Nails Lift: Causes and Warning Signs
- Proper Nail Plate Preparation for Gel: The Foundation of Adhesion
- Gel Nail Curing Time and Lamp Wattage: Getting the Cure Right
- HEMA-Free Gel Benefits: Safer Formulas That Still Bond
- Application Technique: Thin Layers, Free Edge Capping, and Skin Contact
- Moisture Management and Cuticle Oil: Protecting the Bond
- Environmental Factors and Chemical Compatibility: What Competitors Miss
- Conclusion: Building a Lift-Proof Manicure Routine
- Frequently Asked Questions
Last Updated: September 17, 2026
Why Gel Nails Lift: Causes and Warning Signs
Gel nail lifting is the separation of the gel product from the natural nail plate, usually starting at the edges or cuticle area. It happens when the bond between gel and nail breaks down, and it almost always traces back to prep, moisture, or curing problems.
Two things drive almost every lift:
- Chemical causes: moisture, oils, and poor adhesion
- Mechanical causes: bad prep and application errors
Chemical Causes: Moisture, Oils, and Adhesion Failure
The nail plate holds natural oils and water. If those stay on the surface, gel cannot bond to it. The result is pocket lifting, where the product pulls away in small pockets near the cuticle.
Mechanical Causes: Improper Prep and Application Errors
Physical mistakes lift nails just as fast as chemical ones. Common errors include:
- Skipping the gentle scuffing step on the nail plate
- Flooding the cuticle area with product
- Applying layers that are too thick
- Missing the free edge when capping
Proper Nail Plate Preparation for Gel: The Foundation of Adhesion
Proper nail plate preparation for gel is the single biggest factor in whether a manicure lasts. It means cleaning, shaping, and dehydrating the nail before any product goes on. Skip it, and nothing else you do will save the set.
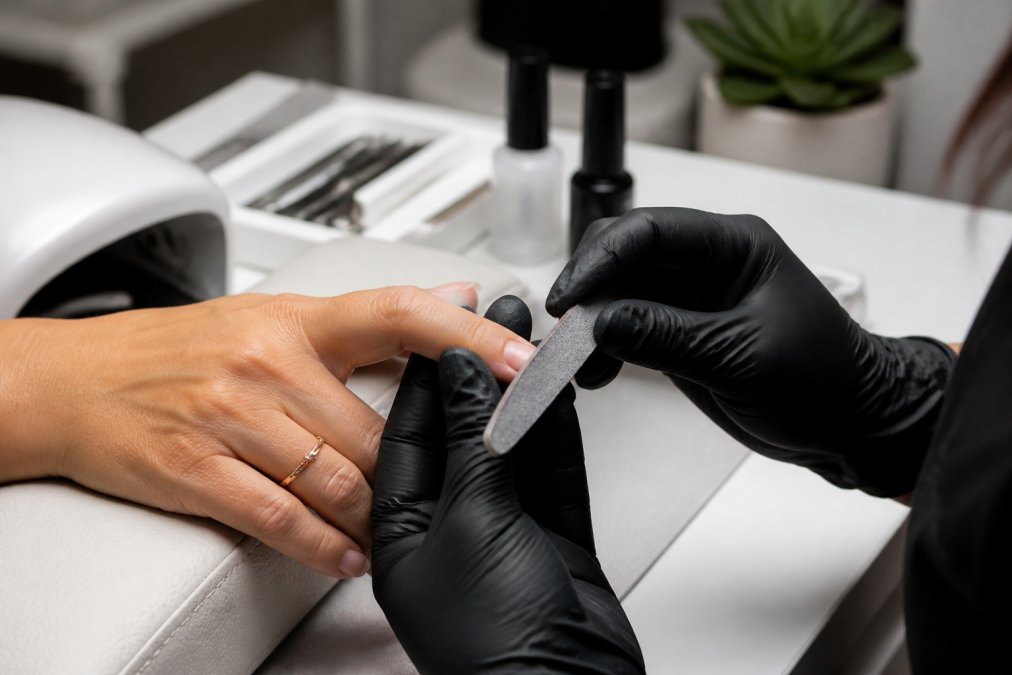
Follow these steps in order:
- Push back cuticles gently, never cut live skin
- File the free edge into shape
- Lightly scuff the nail plate with a fine-grit file
- Brush away all dust
- Wipe with isopropyl alcohol
- Apply dehydrator
- Apply primer if your system calls for it
Dehydrators and Primers: When and How to Use Them
A dehydrator is a liquid that removes moisture and oil from the nail plate. A primer is a bonding agent that helps gel stick to the nail. Use the dehydrator first, then the primer.
Gel Nail Curing Time and Lamp Wattage: Getting the Cure Right
Gel nail curing time and lamp wattage must match, but wattage alone does not tell you whether a cure actually finished. Two lamps rated at 48W can produce very different results because cure depends on wavelength, distance, and the photoinitiators inside the gel, not just raw power.
Wavelength Matters More Than Wattage
Most modern LED gels are formulated for a peak around 365 nm or 395-405 nm. A lamp that peaks at the wrong wavelength can leave the bottom of the layer uncured even when the surface feels hard. That is why a gel can look and feel set but still lift from underneath a few days later.
Match your lamp to your gel system:
| Lamp Type | Typical Wattage | Cure Time for Base Coat | Watch For |
|---|---|---|---|
| LED | 36-48W | 30-60 seconds | Aging diodes, dirty reflectors, wrong wavelength |
| UV | 36W | 2-3 minutes | Bulb age, longer service time |
| Mini LED | 6-18W | 60-90 seconds | Uneven cure on thumbs, weak output at edges |
A few rules keep the cure reliable:
- Cure all five fingers, including the thumb, fully under the light
- Replace bulbs or lamps when cure times start feeling off
- Do not stack thick layers, since light cannot reach the bottom
- Follow the gel maker's cure chart, not a guess
- Keep the hand flat and close to the bulbs, distance cuts intensity fast
The Cross-Brand Cure Problem
This is the part most guides skip. A base coat and a color from different systems may use different photoinitiators tuned to different wavelengths. Your lamp might fully cure one and under-cure the other in the same 60-second pass. The result is a layer that looks fine on day one and lifts from the middle of the nail by day five.
Quick Cure Self-Check
Before you blame prep for a lift, rule out the cure:
- Does the gel smell slightly wet or feel tacky after curing? That points to under-cure.
- Does the lift start in the middle of the nail rather than the edges? That points to a cure or layer-thickness problem.
- Has the lamp been in service more than a year without new diodes or bulbs? Output drops with age.
- Are you using a mini lamp on thumbs and a full lamp on the rest? Uneven cure across fingers is common.
HEMA-Free Gel Benefits: Safer Formulas That Still Bond
HEMA-free gel benefits go beyond safety. HEMA is a common bonding ingredient that can trigger allergic reactions in some clients and techs. HEMA-free formulas remove it while still holding a strong bond.
What to know:
- HEMA-free does not mean weaker, it means a different chemistry
- Always patch test new clients
- Keep uncured gel off the skin, since repeated skin contact is the main cause of sensitivity
- Store gels away from direct light and heat
Application Technique: Thin Layers, Free Edge Capping, and Skin Contact
Thin layers cure fully. Thick layers do not. This one rule prevents more lifting than any product swap.
Thin layers, capped free edge, no skin contact. Get these three right and most gel nail lifting problems disappear.
Moisture Management and Cuticle Oil: Protecting the Bond
Water is the enemy of a fresh set but a friend to nails over time. The trick is timing.
- Avoid soaking hands right after a manicure
- Wear gloves for dishes and cleaning
- Apply cuticle oil daily to keep the nail flexible
- Skip oil on the day of application, since it blocks adhesion
Environmental Factors and Chemical Compatibility: What Competitors Miss
Two things most guides skip: the room you work in and the products you mix. Both change how gel behaves, and both show up as lifting you cannot fix with better prep alone.
Chemical Compatibility: Why Mixing Systems Causes Lifting
Not every base coat works with every gel brand. Each layer, base, color, top, is formulated with its own monomers, oligomers, and photoinitiators. When two systems are designed to bond to each other, their chemistries are matched. When you mix them, the layers may cure at different rates and fail to cross-link at the interface.
A simple compatibility rule:
- Stay within one system for base, color, and top coat whenever possible
- If you must mix, test on one nail before committing to a full set
- Do not assume "gel is gel", a hard base under a flexible color can shear apart as the nail flexes
- Keep a written record of which combinations have failed for you
Environmental Factors: Humidity, Temperature, and Dust
Salon conditions affect adhesion in ways that are easy to overlook:
- High humidity slows solvent flash-off in some prep products and traps moisture at the nail surface. Dehydrator may need longer to work, and gel can absorb ambient moisture before curing.
- Cold rooms make gel thick and hard to apply thin. Thick, cold gel cures unevenly and lifts from the middle.
- Dust from filing contaminates the next layer. If you file after dehydrating, you reintroduce debris. File first, then dehydrate.
- Direct sunlight can start curing gel on the brush or in the pot before you are ready. Keep the pot closed and work away from windows.
Visual Diagnostic Guide: Read the Lift Location
Where the lift starts tells you what went wrong. Use this before you change products:
| Lift Location | Likely Cause | Fix |
|---|---|---|
| Cuticle area, in pockets | Moisture, oil, or flooded cuticle | Re-check dehydrator and cuticle cleanup |
| Sidewalls | Gel touched skin and cured into a ledge | Keep product off skin, refine application |
| Free edge / tip | Missed capping | Cap every layer, seal the tip |
| Middle of the nail | Under-cure or thick layer | Check wavelength, cure time, layer thickness |
| Whole nail, clean sheet | Cross-brand incompatibility | Return to one system, patch test |
Mixing brands mid-service is a hidden cause of lifting. If your base coat and color come from different systems, the chemical bond between them may fail even when each product works fine on its own. When a set lifts in one clean sheet from the middle, suspect compatibility before you suspect prep.
Lift location is a diagnostic, not a coincidence. Cuticle lift means prep or moisture. Tip lift means capping. Middle lift means cure or thickness. Whole-nail sheet lift means incompatible chemistry.
Conclusion: Building a Lift-Proof Manicure Routine
Lifting is not random. It follows a pattern, and once you can read that pattern, you can fix it. Prep, cure, thin layers, and moisture control cover almost every case.
Frequently Asked Questions
Why are my gel nails lifting up even when I follow all the steps?
Lifting usually traces back to one of three things: moisture or oils left on the nail plate, insufficient curing, or applying gel too thick. Even a thin film of cuticle oil or natural oil can block adhesion. Make sure you dehydrate the nail plate, use an acid-free primer if needed, and cure each layer fully under a lamp that matches your gel's wattage requirements. If lifting starts at the cuticle area, prep is the likely culprit; if it starts at the free edge, capping technique or layer thickness is usually the cause.
Is it normal for gel nails to lift after 2 weeks?
Some growth at the cuticle is normal after two weeks because the natural nail has grown out, but actual lifting or peeling of the gel from the nail plate is not. A well-applied gel manicure should stay bonded for three to four weeks with proper aftercare. If you see pocket lifting or peeling at two weeks, review your prep work, curing time, and whether you are capping the free edge. Moisture exposure and missed cuticle oil application can also speed up lifting.
How does HEMA-free gel affect nail adhesion?
HEMA-free gels use alternative monomers that can bond just as well as traditional HEMA-based formulas when applied correctly. The key is matching your curing lamp to the gel's photoinitiator system, since some HEMA-free formulas need a specific wavelength or higher wattage for full polymerization. HEMA-free options reduce the risk of allergic reactions for both technicians and clients, which matters for long-term salon safety. Proper nail plate preparation and thin layers remain essential regardless of formula.
Does improper cuticle prep cause gel lifting?
Yes, cuticle prep is one of the most common causes of lifting. If any cuticle tissue or pterygium remains on the nail plate, gel will bond to that tissue instead of the nail, and it will peel away within days. Use a cuticle pusher and nippers to remove non-living tissue, then gently scuff the nail plate with a fine-grit file. Follow with a dehydrator to remove oils. Skipping these steps or rushing them is the fastest way to see pocket lifting at the cuticle area.